How To Add The D365 App Add-on to Outlook2 min read

How To Add The D365 App Add-on to Outlook
Welcome to this, the third in a series detailing your most-asked questions about Microsoft Dynamics 365, Power Platform and Dataverse! So far, we have described the changing face of Modern Advanced Find and shown you how to create new columns in Power Apps. Now, Cloud9’s experts Dan, Jim and Yolandi are here to help you add the Dynamics 365 app add-on to Microsoft Outlook.
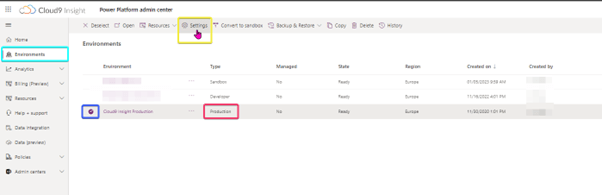
Head to admin.powerplatform.com and log in with your CRM login Credentials. Click on “Environments” and find the “Production” Environment, Select the tick box next to the environment that you wish to work on and then click “Settings”.
- Security
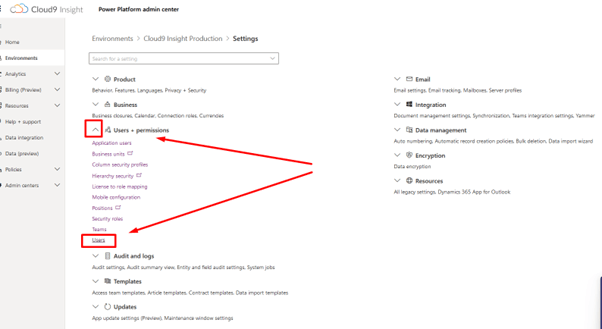
- Click the drop-down menu beside “Users + permissions” and then click “Users”.

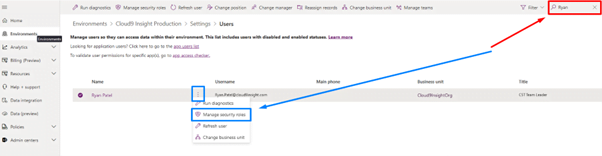
- Search for the User in question, using the search bar in the top right corner. Once found, Click the three dots next to the User’s Name and click “Manage Security Roles”.

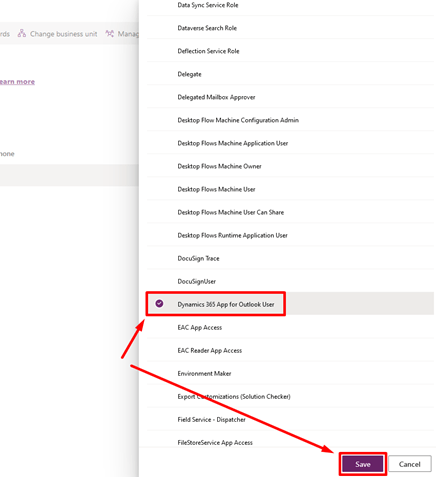
- A pane will open on the right of the screen. From here, Find and Select the “Dynamics 365 for Outlook Users” role and then Click “Save”.

- Click the drop-down menu beside “Users + permissions” and then click “Users”.
- Email Configuration
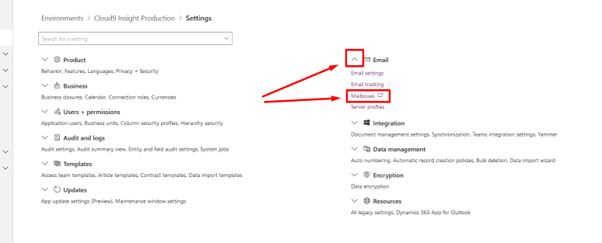
- Again from the chosen Environment’s Settings menu, Click the drop-down menu beside “Email” and then click “Mailboxes”.

- Search for the User and open their record by clicking their name.

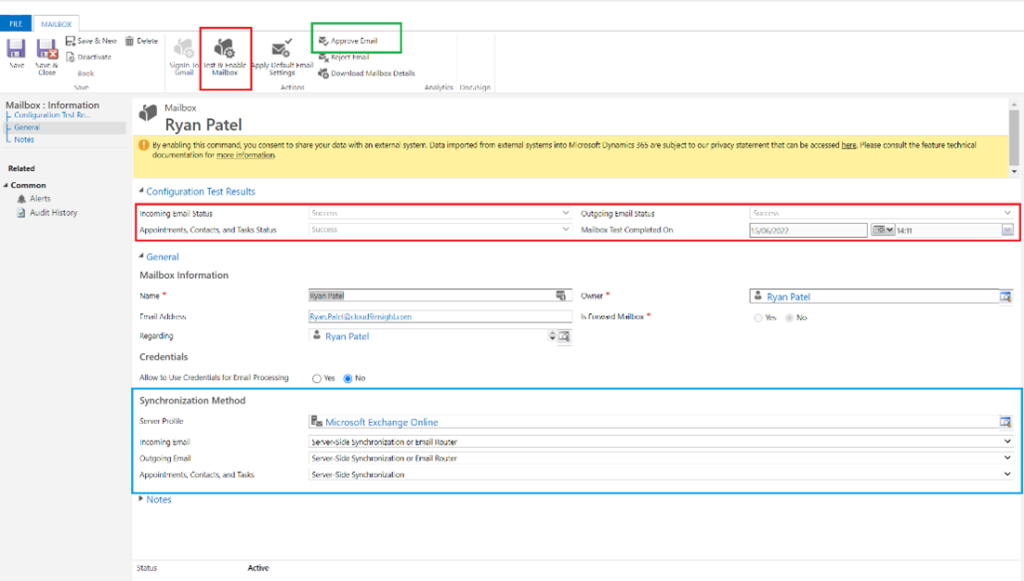
- This step has 3 subcomponents. All refer to the screenshot below.

- Approve Email
- Click the “Approve Email” Button and then OK.
- Server-Side Synchronisation
- Ensure that the dropdown options for “Incoming Email”, “Outgoing Email” and “Appointments, Contacts, and Tasks” match that of the image above.
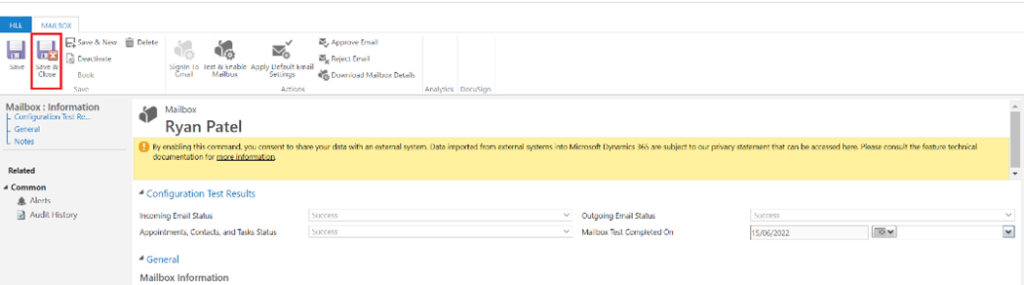
- Test & Enable Mailbox. Click the “Test & Enable Mailbox” button. You may need to “hard refresh” the screen a few times (by pressing Ctrl+F5) until you see the “Incoming Email Status”, “Outgoing Email Status” and “Appointments, Contacts, and Tasks Status” all are showing.
- Once all of these steps have been completed select “Save and Close” in the top left of the screen.

- Approve Email
- Again from the chosen Environment’s Settings menu, Click the drop-down menu beside “Email” and then click “Mailboxes”.

- Dynamics 365 App for Outlook
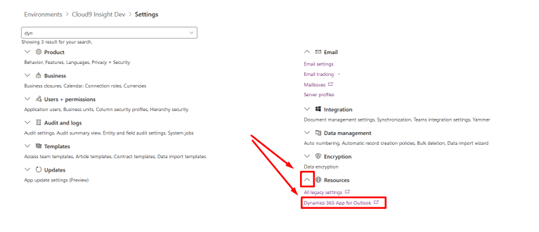
- Again from the chosen Environment’s Settings menu, click the drop-down menu beside “Resources” and then click “Dynamics 365 App for Outlook”.

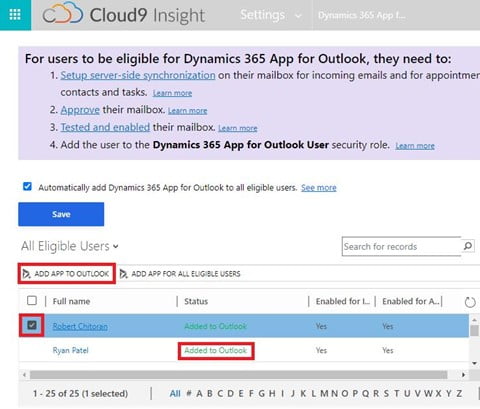
- Again, Search for the User. Select the User by ticking the checkbox to the left of their name. Then a new option should appear called “ADD APP TO OUTLOOK” (see image). Click this option and then their Status should be changed to “Added to Outlook”.

- Again from the chosen Environment’s Settings menu, click the drop-down menu beside “Resources” and then click “Dynamics 365 App for Outlook”.
--
Thanks for reading our guide, How To Add The D365 App Add-on to Outlook. Want more expert advice? Head to the Cloud9 Insight blog today.
For more tech tips and Insight insider knowledge, don’t forget to bookmark our blog today.
Want help wrangling Modern Advanced Find? Head here.
Cloud9 Insight is on a mission to make Microsoft Dynamics 365 more manageable to use than ever before. Want it for your SMB? Get in touch today.
Share On Social Media
![]()
![]()
![]()
Join Our Mailing List
Get the latest Dynamics 365 news, blog updates, webinars events and invitations.