Dynamics 365 for Outlook – Cloud9 Product Insights1 min read
Welcome to Product Insights. A new series of articles from Cloud9 designed to inform and inspire the way you work with your Microsoft Dynamics 365 CRM.
These articles are produced by the experts, specifically the friendly faces behind our highly accredited Customer Success Team (CST). Our expertise is what sets us apart here at Cloud9 and the CST are a huge part of this. So, we’re spotlighting their insights in this new series. Up first is CST Team Leader, David Dumbleton, who has written his guide to configuring Dynamics 365 for Outlook.
Dynamics 365 App for Outlook Configuration
How to configure Dynamics 365 App for Outlook.
Microsoft Dynamics 365 App for Outlook allows email tracking and synchronisation of calendar data between Outlook and Dynamics 365 CRM.
The following knowledge article will detail the necessary steps to deploy Dynamics 365 App for Outlook to users in your organization. These steps will need to be completed for each user that you wish to deploy the app for.
Please note: in order to complete these steps, it is required to have the Global Administrator security role.
Enable server-side synchronisation
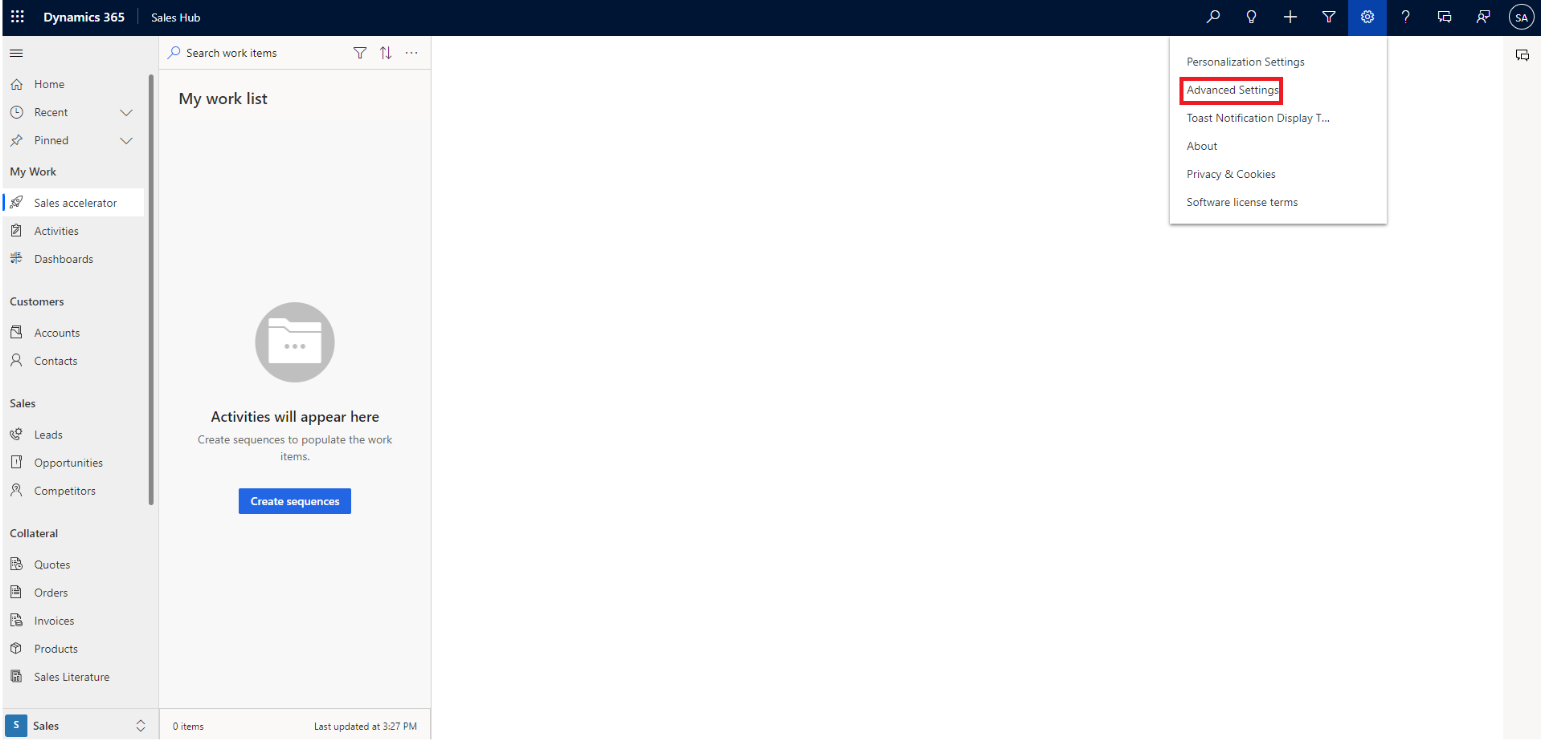
1) Open your CRM and go to "Advanced Settings".
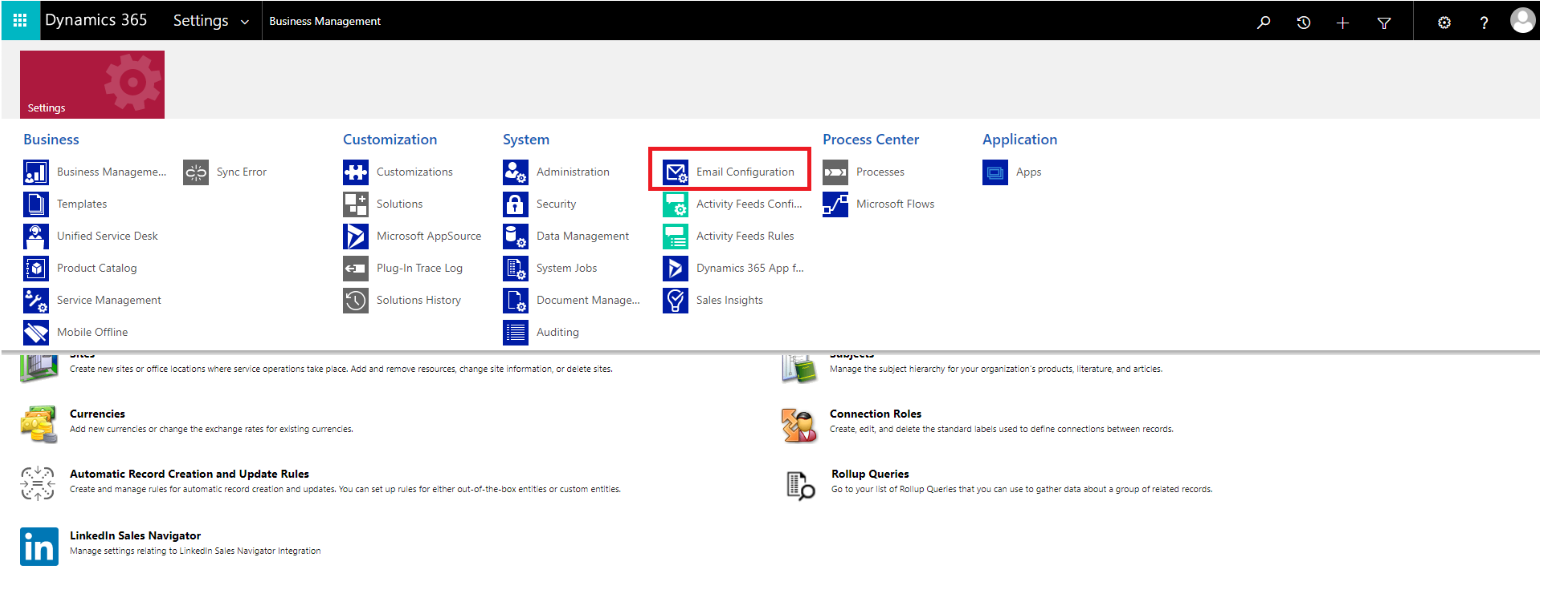
2) Go to "Settings", then open "Email Configuration".
3) Open "Mailboxes".

4) Find the user you want to enable the app for and open their mailbox settings.

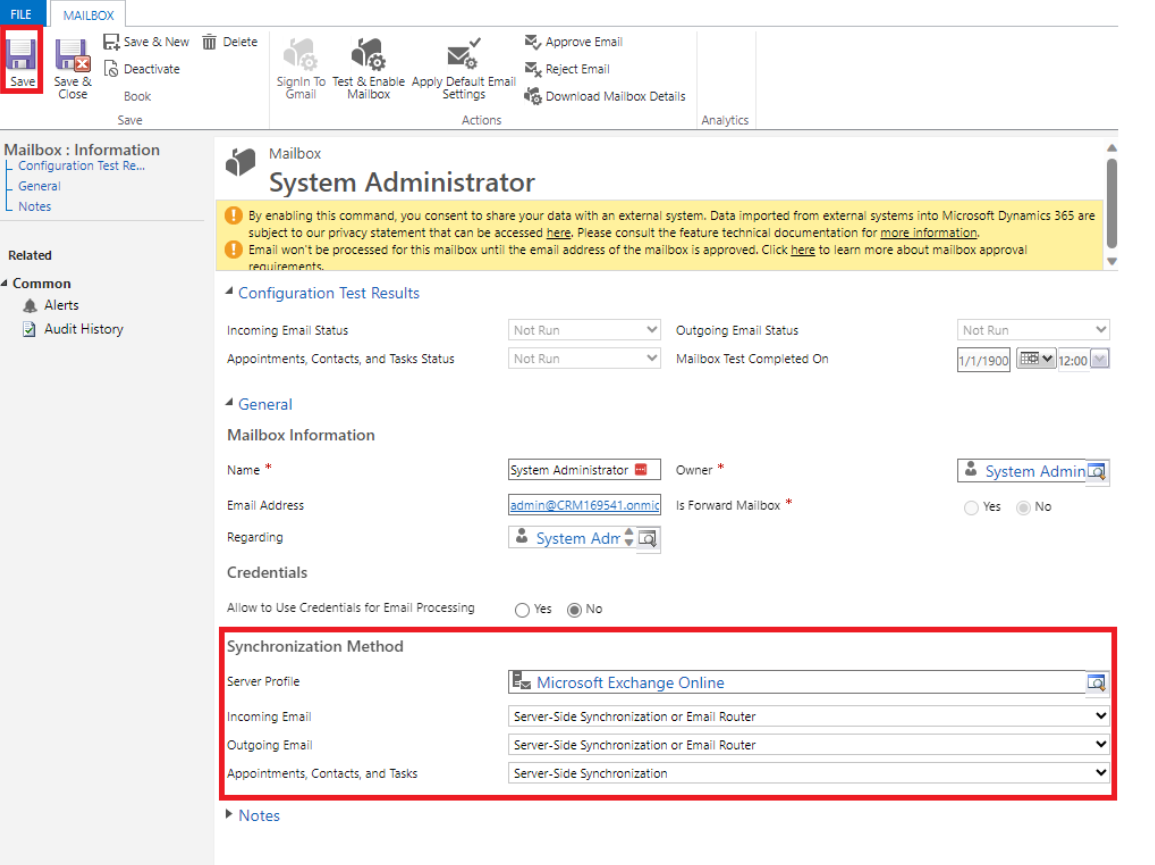
5) Enable Server-Side Synchronization for the following: Incoming Email, Outgoing Email, and Appointments, Contacts and Tasks. Then, press "Save".
Now it’s time to approve the mailbox
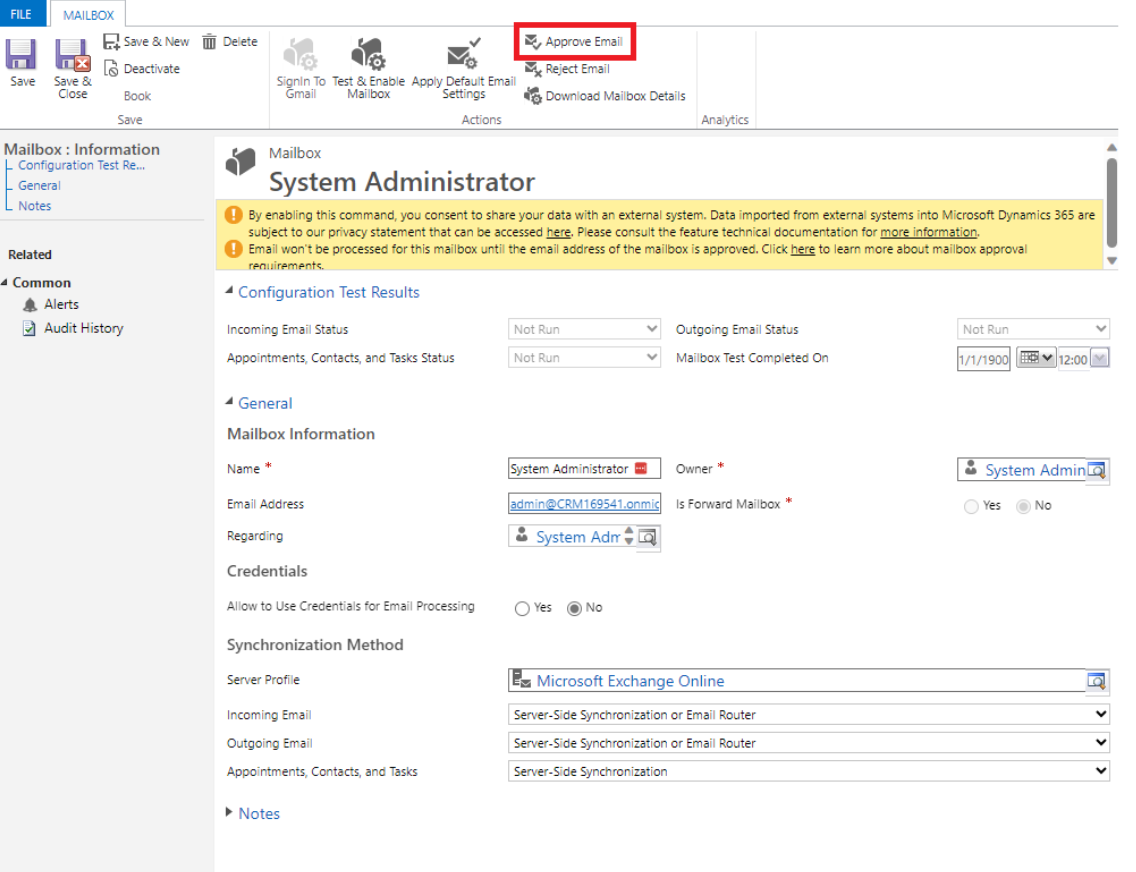
6) Press "Approve Email” and approve any resulting popups.
Now you’re ready to test and enable the mailbox
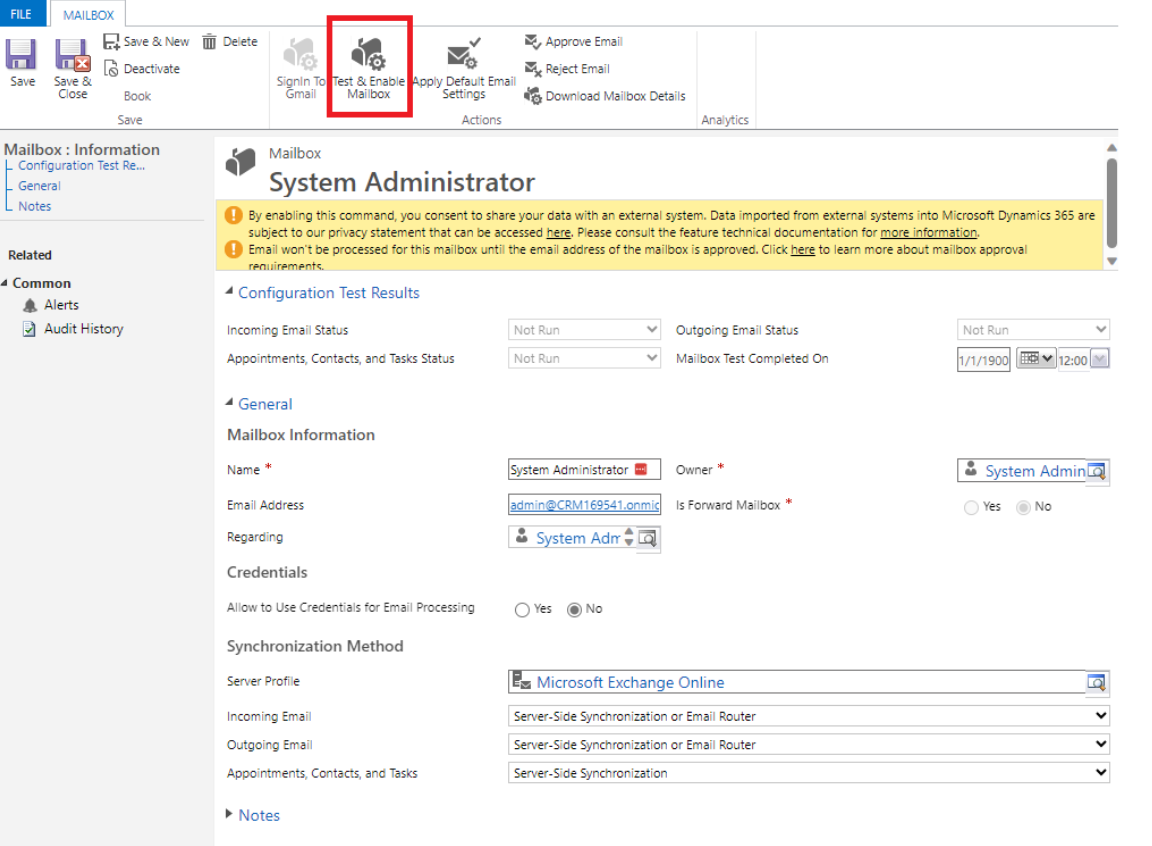
7) Press "Test and Enable Mailbox" and approve any resulting popups.
Add the app to Outlook
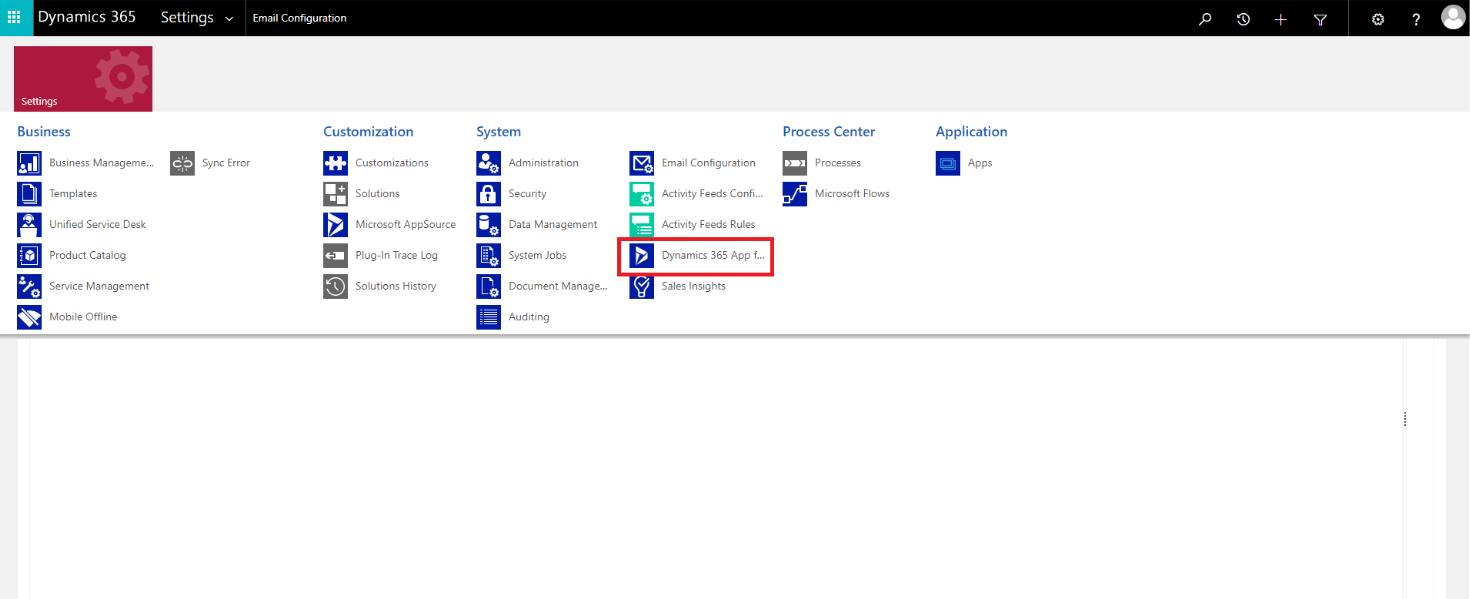
8) Go back to Advanced Settings and open "Dynamics 365 App for Outlook".
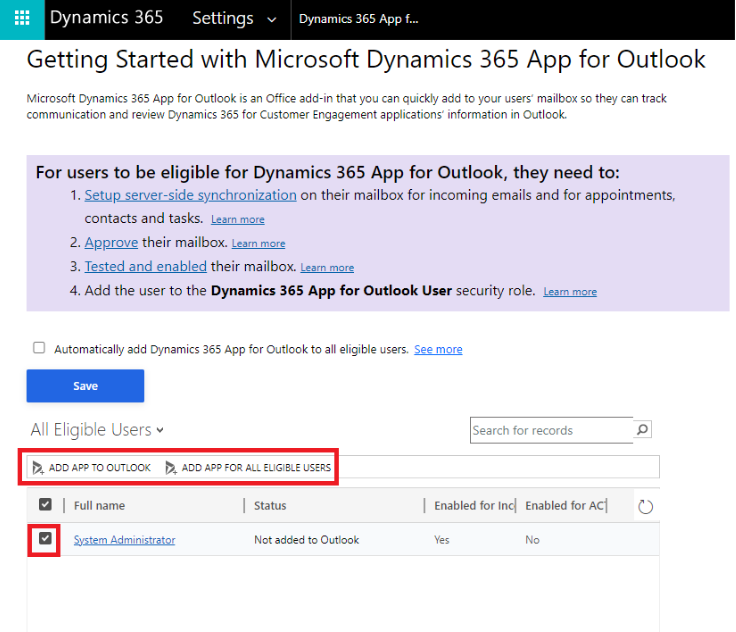
9) Find the user/s you want to add the app to and press either "Add App to Outlook" or "Add App for All Eligible Users".
To find out more, check out Microsoft’s official documentation.
Documentation Links:
Dynamics 365 App for Outlook Overview (Dynamics 365 apps) | Microsoft Learn
How to deploy Dynamics 365 App for Outlook | Microsoft Learn
Join Our Mailing List
Get the latest Dynamics 365 news, blog updates, webinars events and invitations.
