How to create and edit system views in Microsoft Dynamics 365 – Cloud9 Product Insights4 min read
Welcome to Product Insights. A new series of articles from Cloud9 designed to inform and inspire the way you work with your Microsoft Dynamics 365 CRM. Today we’re taking a closer look at how to create and edit system views within Dynamics 365.
What are Product Insights?
Whether you’re just starting your Dynamics journey, or running your practice, these articles are designed to shine a light on features and best practices that can support your team. They’re brought to you by Dynamics experts, specifically the friendly faces behind our highly accredited Customer Success Team (CST).
Our expertise is what sets us apart here at Cloud9 and the CST are a huge part of this. So, we’re spotlighting their insights in this new series. This article comes courtesy of Client Success Team Leader, David Dumbleton, who has written his guide to creating and editing system views.
Why should you create and edit your Dynamics 365 system views?
Creating and editing system views in Microsoft Dynamics 365 provides several benefits:
Customisation: You can create your own custom System Views or Dashboards to replace the out-of-the-box ones. While the default system views give you plenty of options, the ability to tailor them to your needs offers a potentially game-changing productivity boost.
Efficiency: System views resemble an Excel spreadsheet, allowing you to quickly view, sort, and filter large amounts of data. They can be transformed into charts, exported to other apps or customised to create a personal view.
Self-service: It is much more intuitive, simplified and easier for your System Administrators to be in control of their own changes and less reliant on partners.
Optimisation: If you find a view that meets most of your business needs but requires a bit of work to optimise, you can use the existing system view as a template for a new, fully optimised version.
Default View Setting: An additional option that you have is to set a default System View. This can help streamline your workflow by immediately presenting the most relevant information.
Deactivation of Unused Views: There may be Views or Dashboards that go unused and are a hindrance rather than a help. These can be deactivated to clean up your workspace.
Using PowerApps to create and edit system views

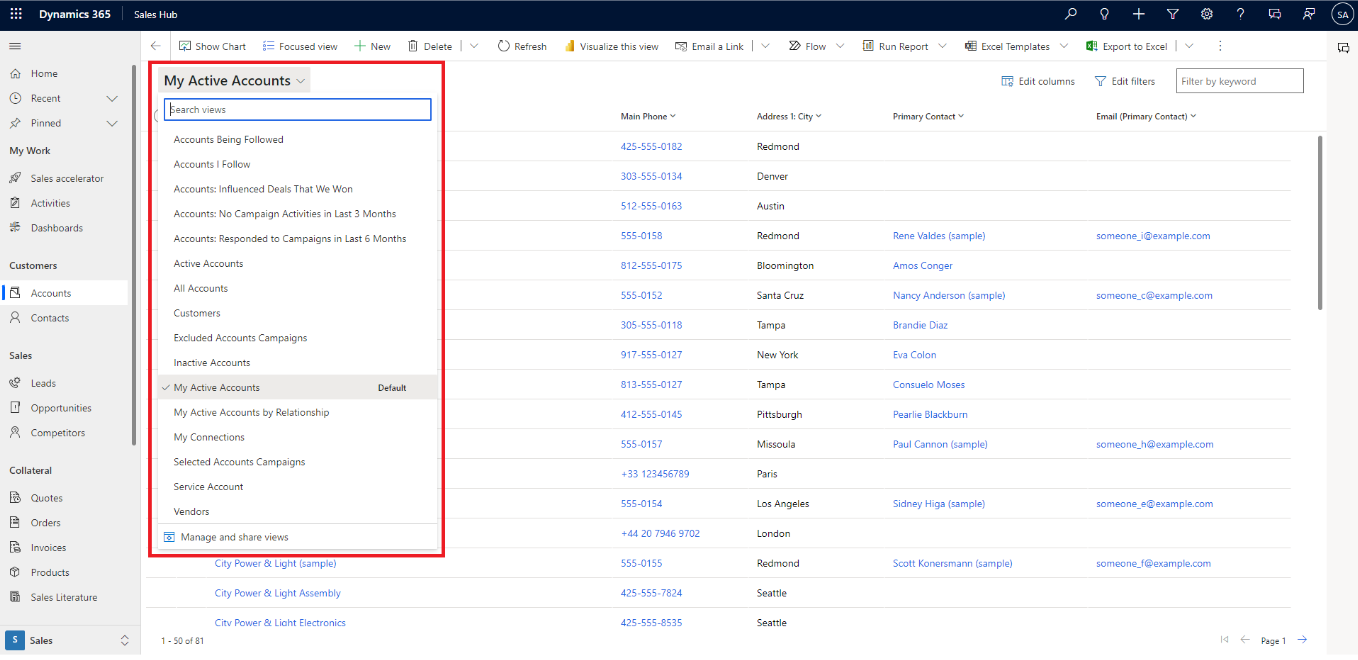
Views can be used in Microsoft Dynamics 365 to easily view and filter data while viewing many records at once. You can create multiple views for each table, and can easily change them using the view selector. A system view is a view that has been created in the backend and is available to all users in your environment.
The purpose of this Knowledge Article is to detail how to create and edit system views in Microsoft PowerApps. The information in this article assumes that correct application lifecycle management (ALM) procedures are followed, for example, using solutions and publishers when making changes to ensure alignment between DEV, UAT and PROD environments.
Editing System views in Microsoft PowerApps
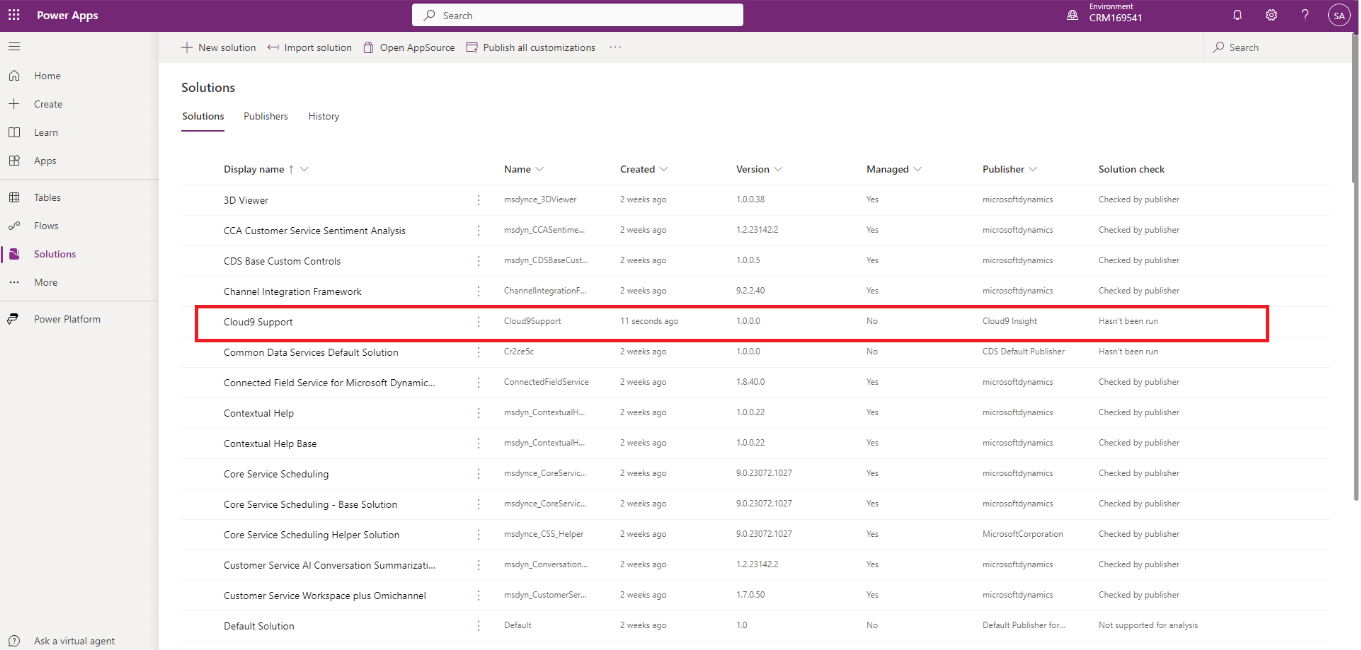
- Go to make.powerapps.com and ensure you are in the correct environment, then go to "Solutions"

- Open your solution. Note: You should only use a solution that you have created, with a publisher owned by your organization.

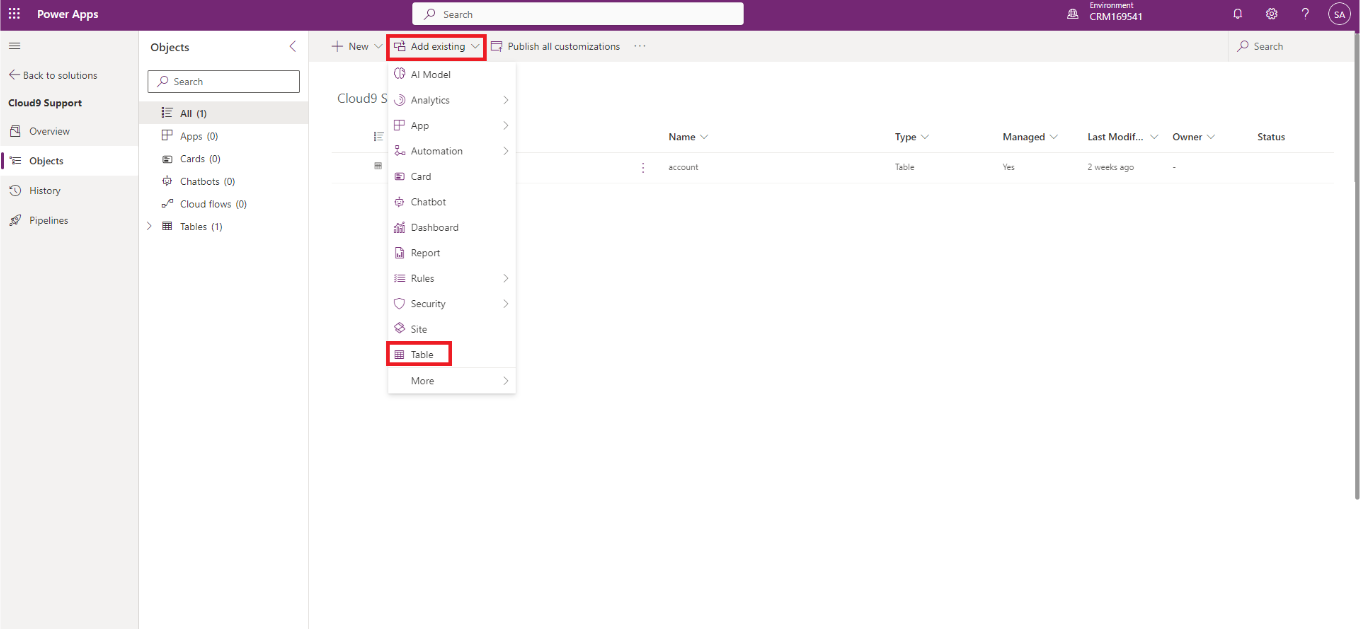
- In your solution, to add the table you want to create/edit a system view for, press "add existing" followed by "table".

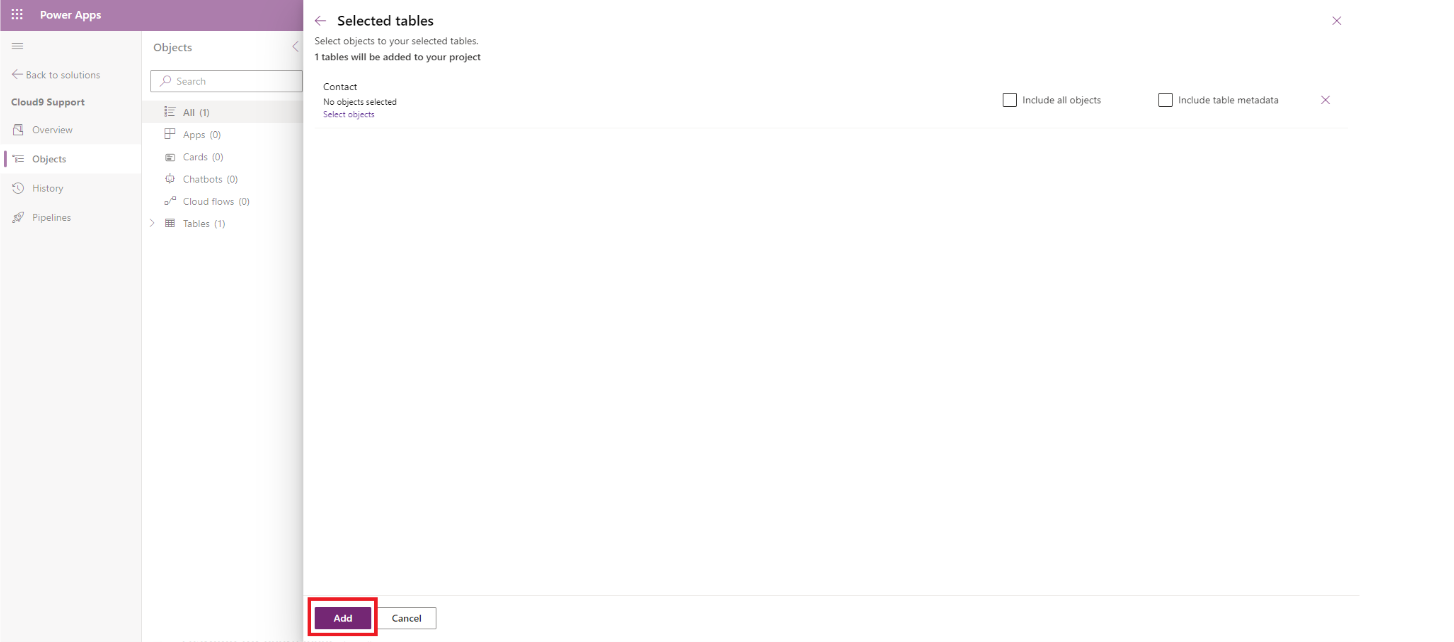
- Select the table you want to create/edit a view for and press "Next".

- Do not select "include all objects" or "include table metadata", as this is considered bad application lifecycle management (ALM) practice. Instead, just press "Add".

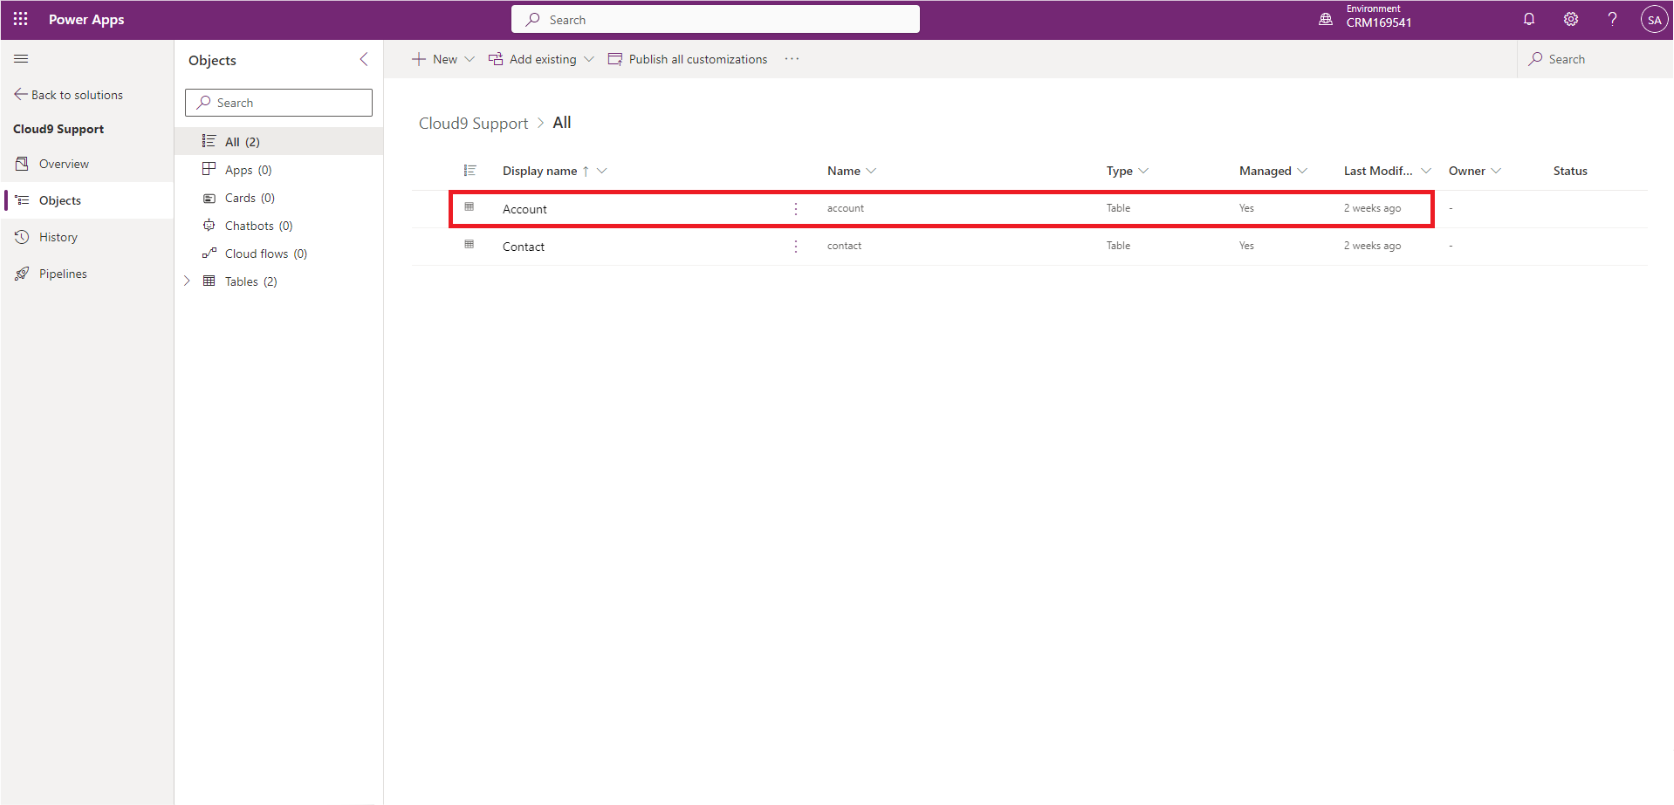
- Open the table you want to create/edit a system view for.

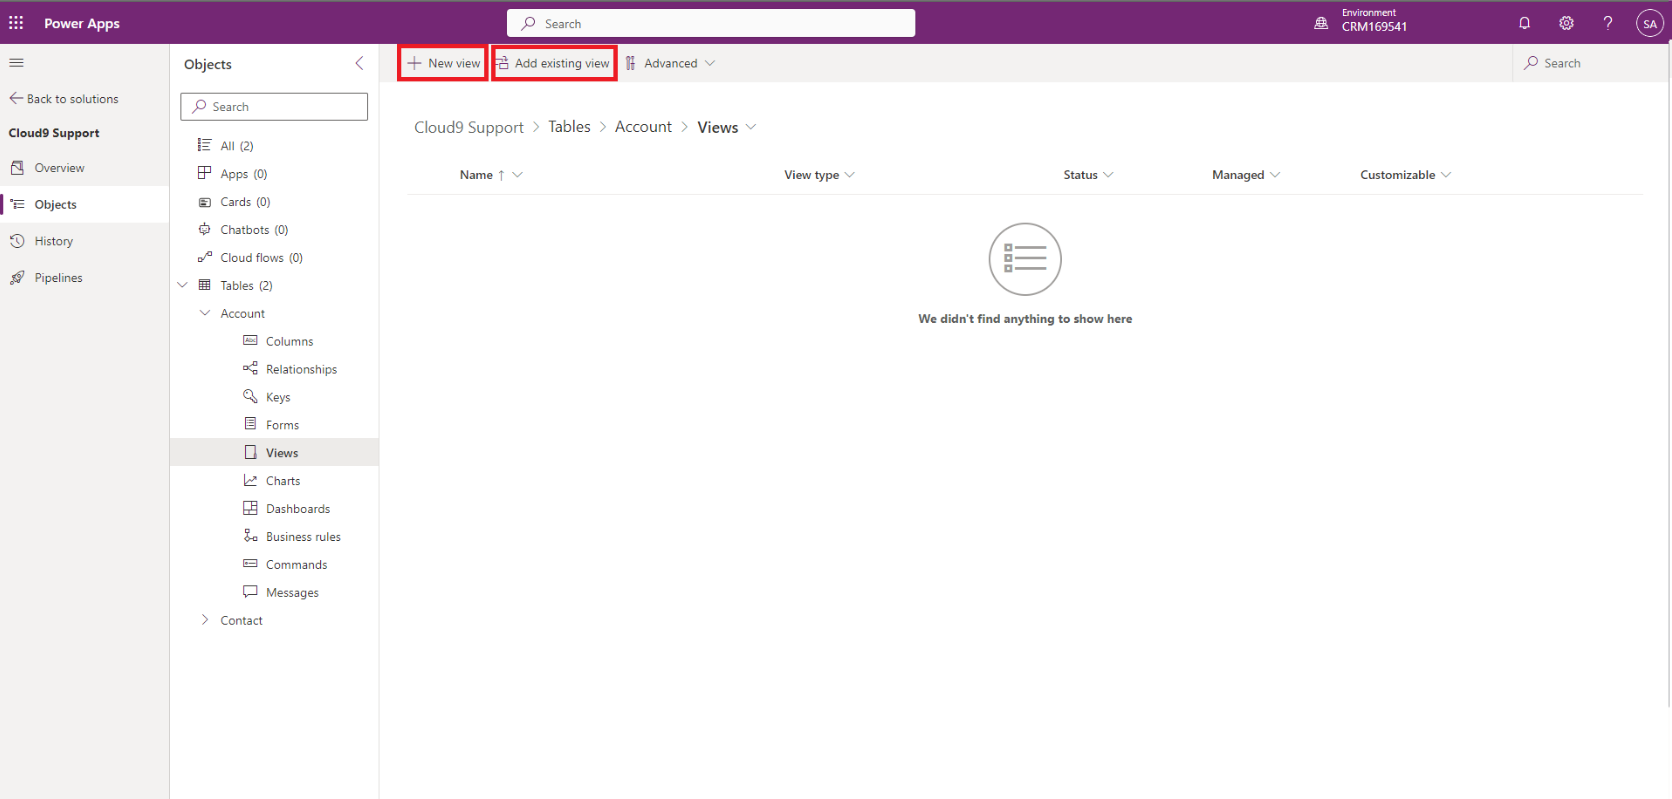
- Press "Views".

- To edit an existing view, press "Add existing view" and search for it in the same way you searched for a table in steps 4 and 5. To create a new view, press "+ New view".

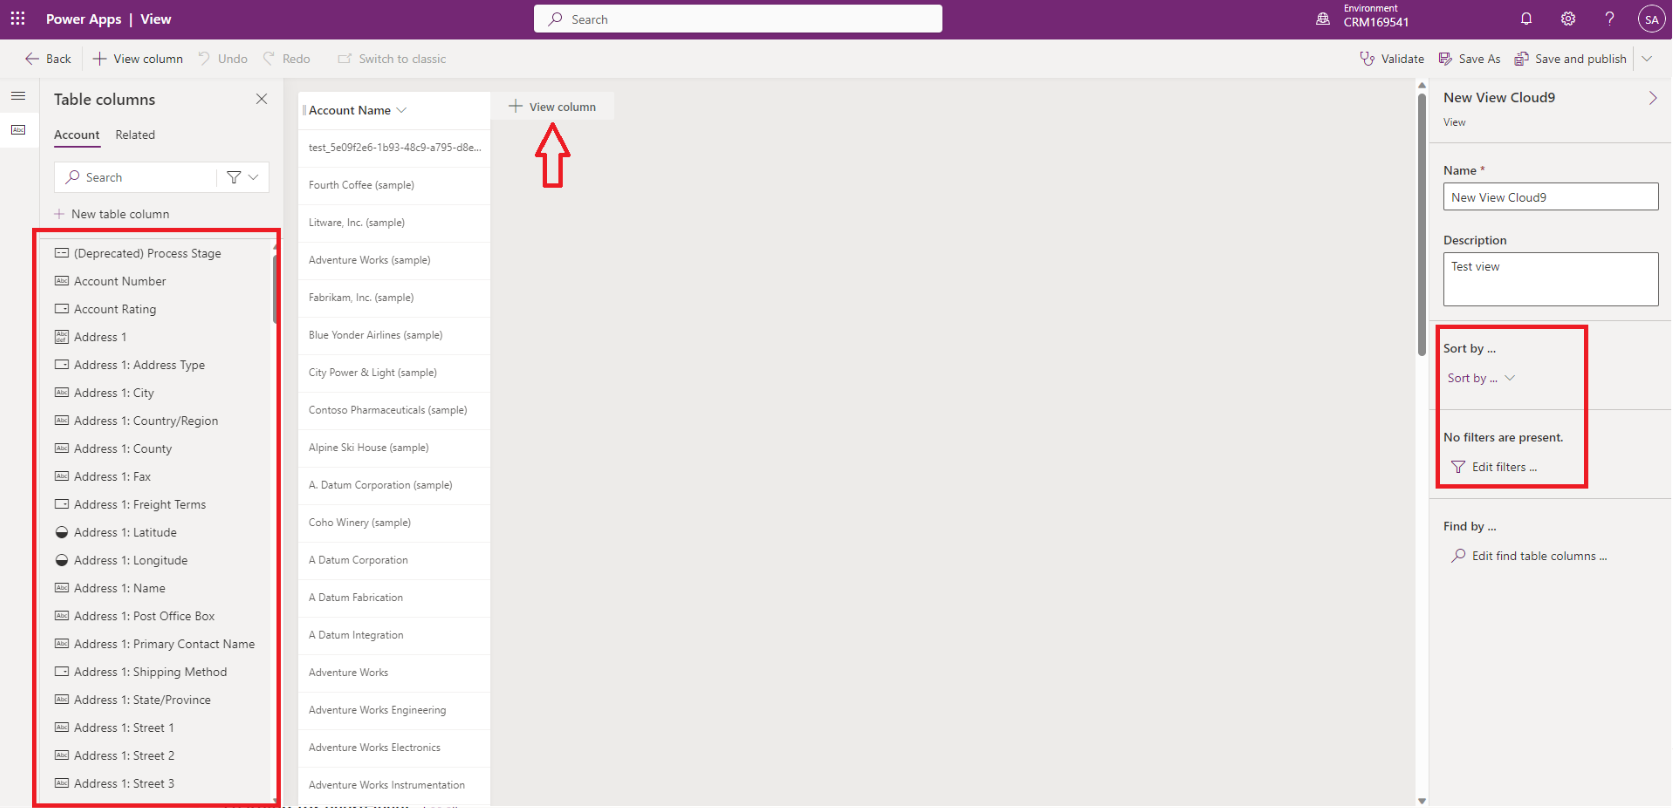
- Enter a view name and description, then press "Create".

- From the view creator, you can drag and drop columns from the "Table columns" section on the left to the editor area in the centre. You can add filters and change sorting criteria with the controls on the right.
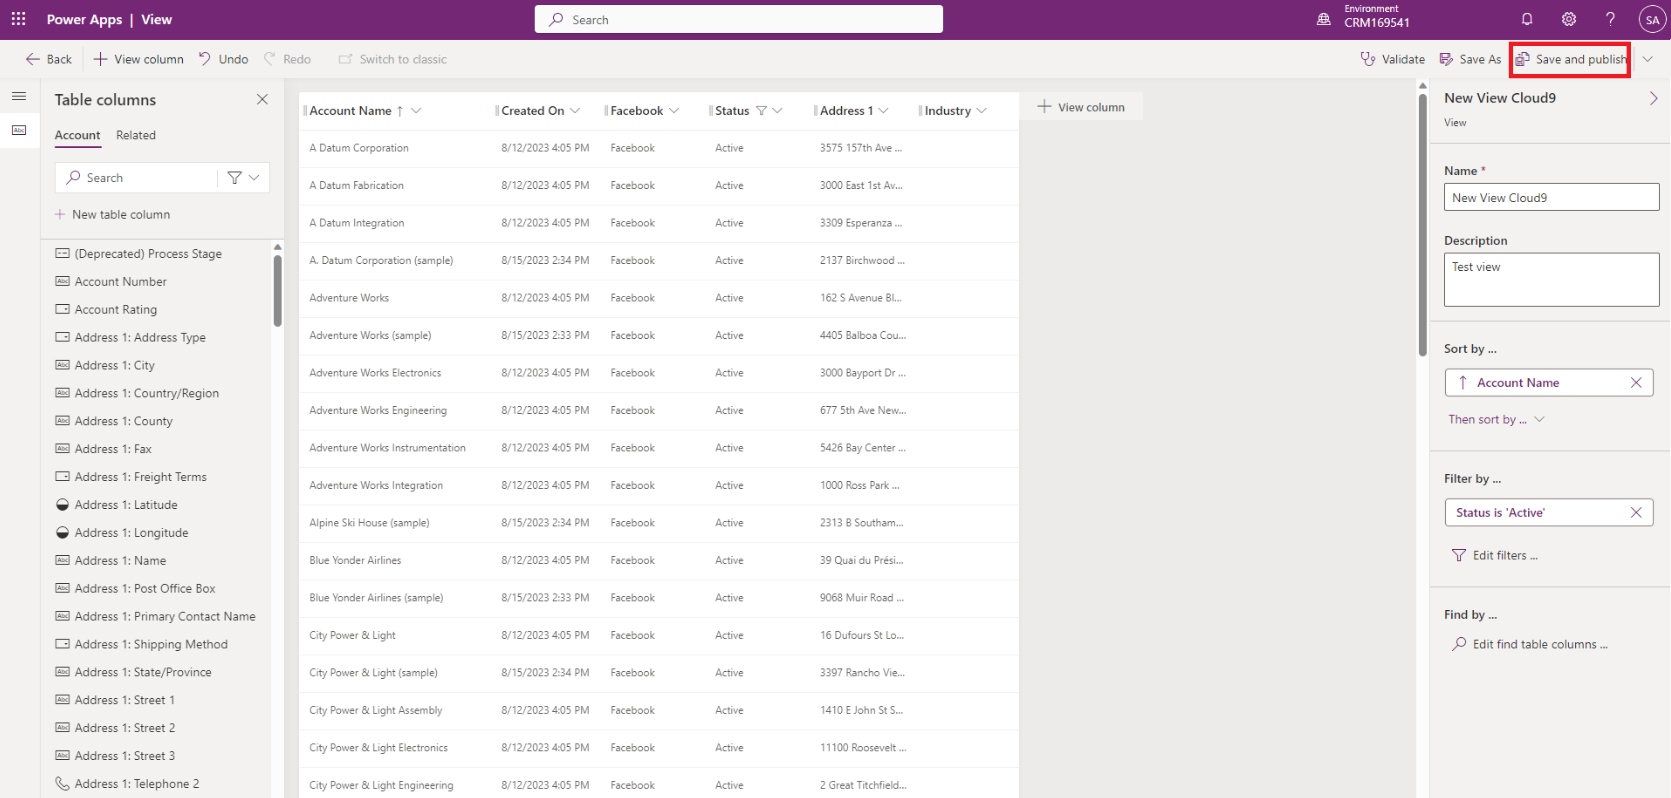
- When you are happy with the columns selected and the filtering criteria, press "Save and Publish" to push the view into the front end of the environment you are working in.

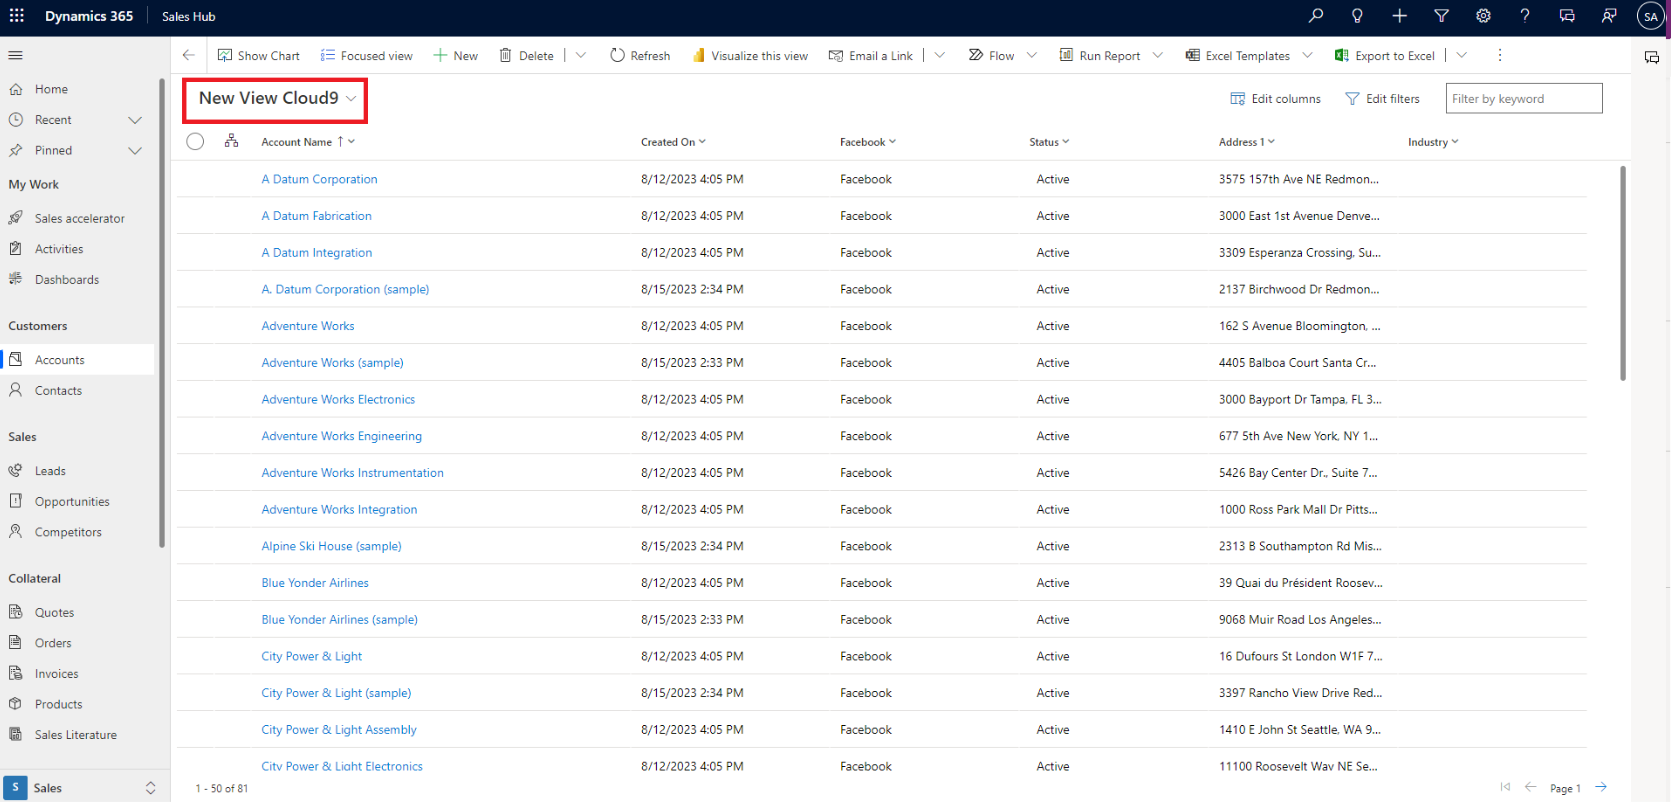
- The view will now show in the front end.


Once you have finished creating your views in this way, the solution should then be pushed from DEV (sandbox) to UAT and PROD environments.
Documentation Links:
Microsoft Learn Documentation: Create and edit public or system model-driven app views with Power Apps - Power Apps | Microsoft Learn
Share On Social Media
![]()
![]()
![]()
Join Our Mailing List
Get the latest Dynamics 365 news, blog updates, webinars events and invitations.